⏰2025年03月18日
在 vitepress 中集成评论区
1. 集成 Giscus
1.1 创建代码仓库
在 GitHub 上创建或者拥有一个
vitepress项目仓库
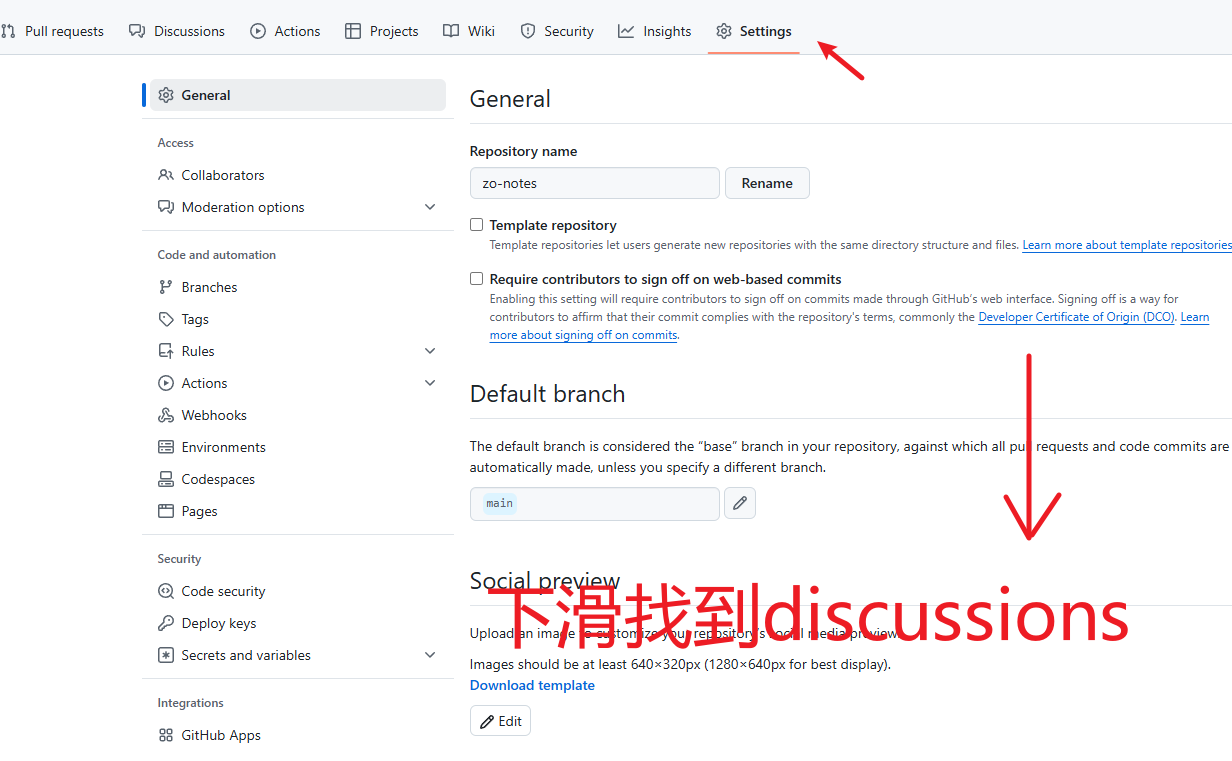
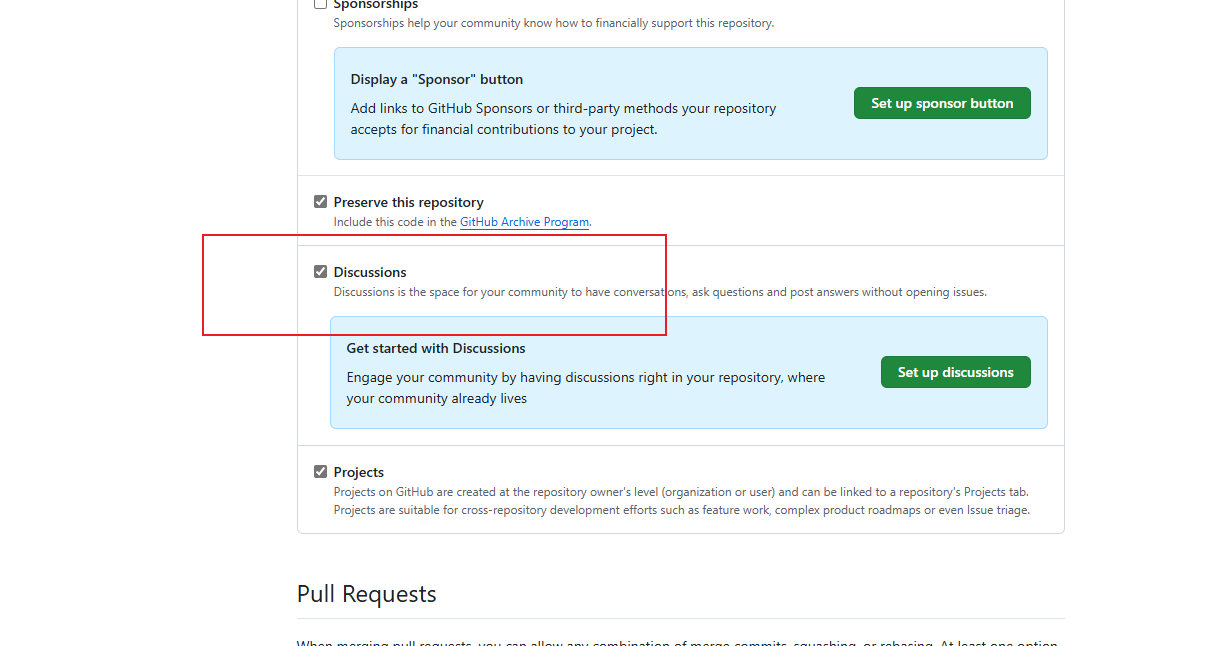
1.2 开启 Discussions 功能
开启 Github 仓库的 Discussions 功能
在仓库的 settings -> General -> 勾选 Discussions✅
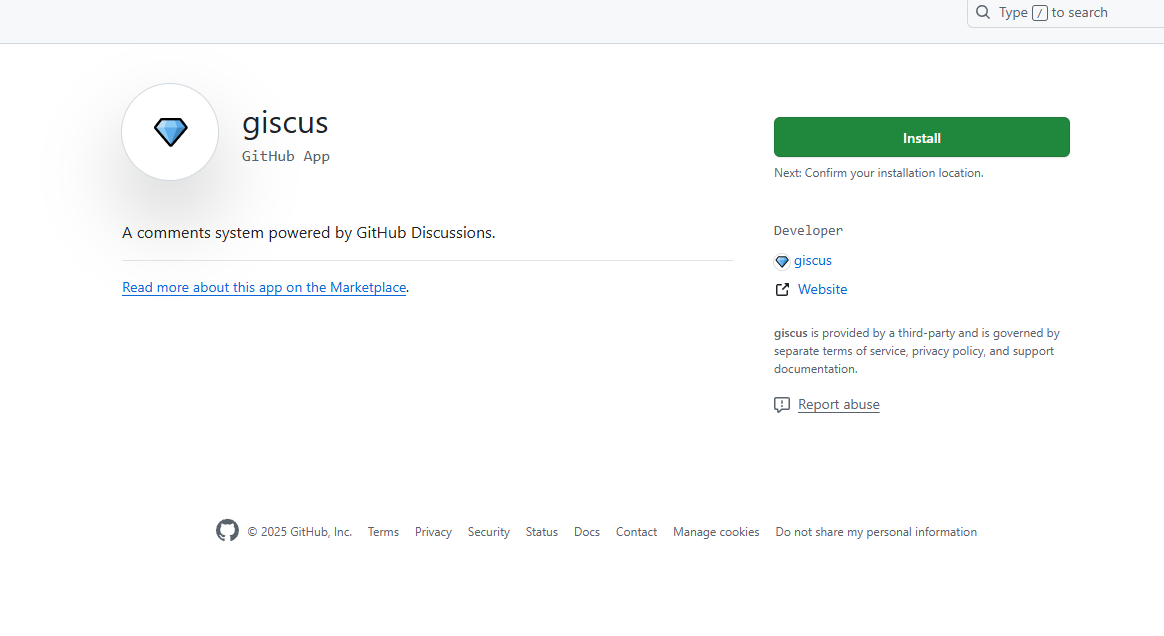
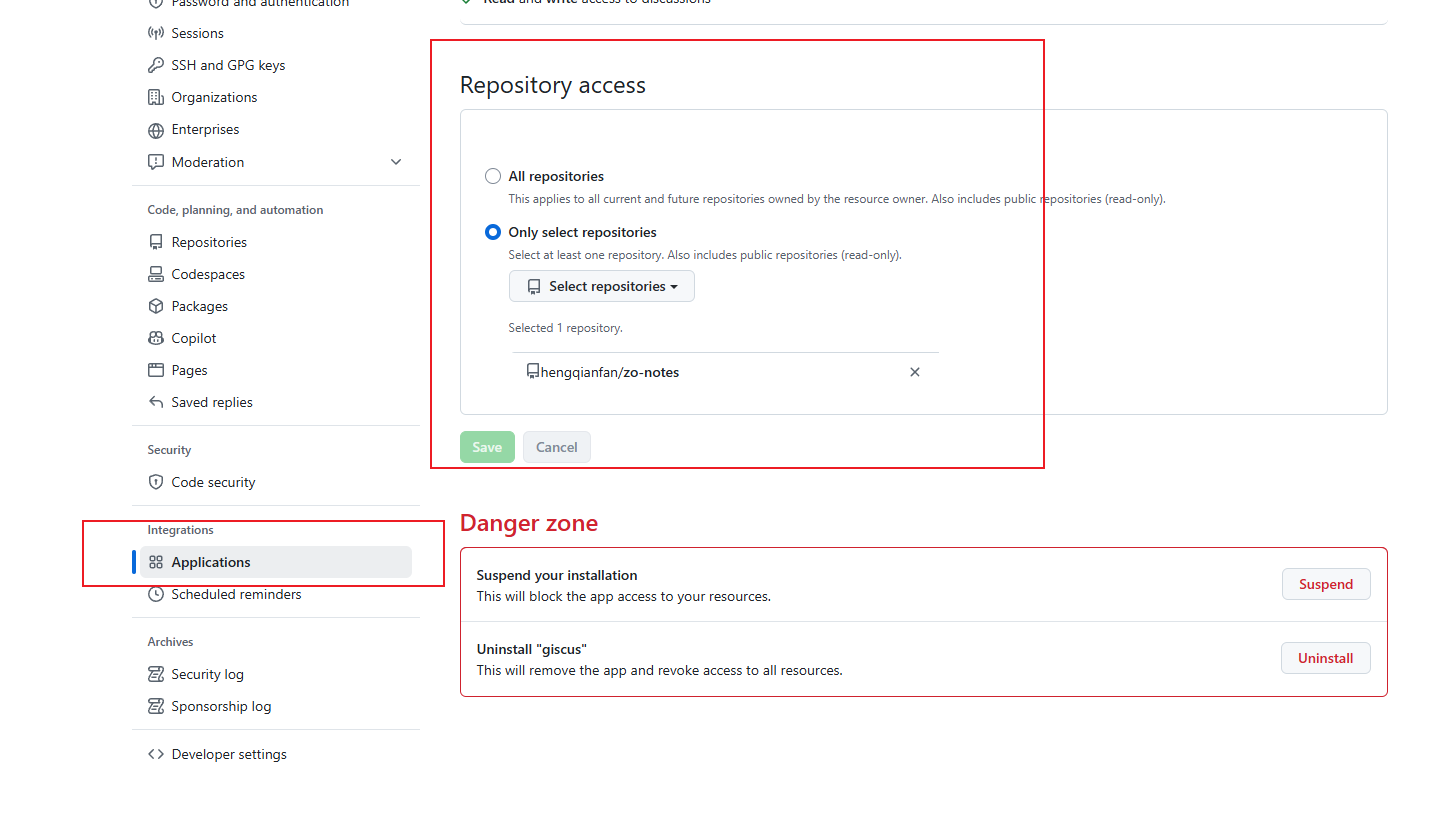
1.3 安装 Giscus app
在 Github 网页中安装 Giscus app (类似插件)
点击安装 :https://github.com/apps/giscus
- 进入页面安装
- 根据自己情况,选择已建的
vitepress的仓库,还是全部仓库
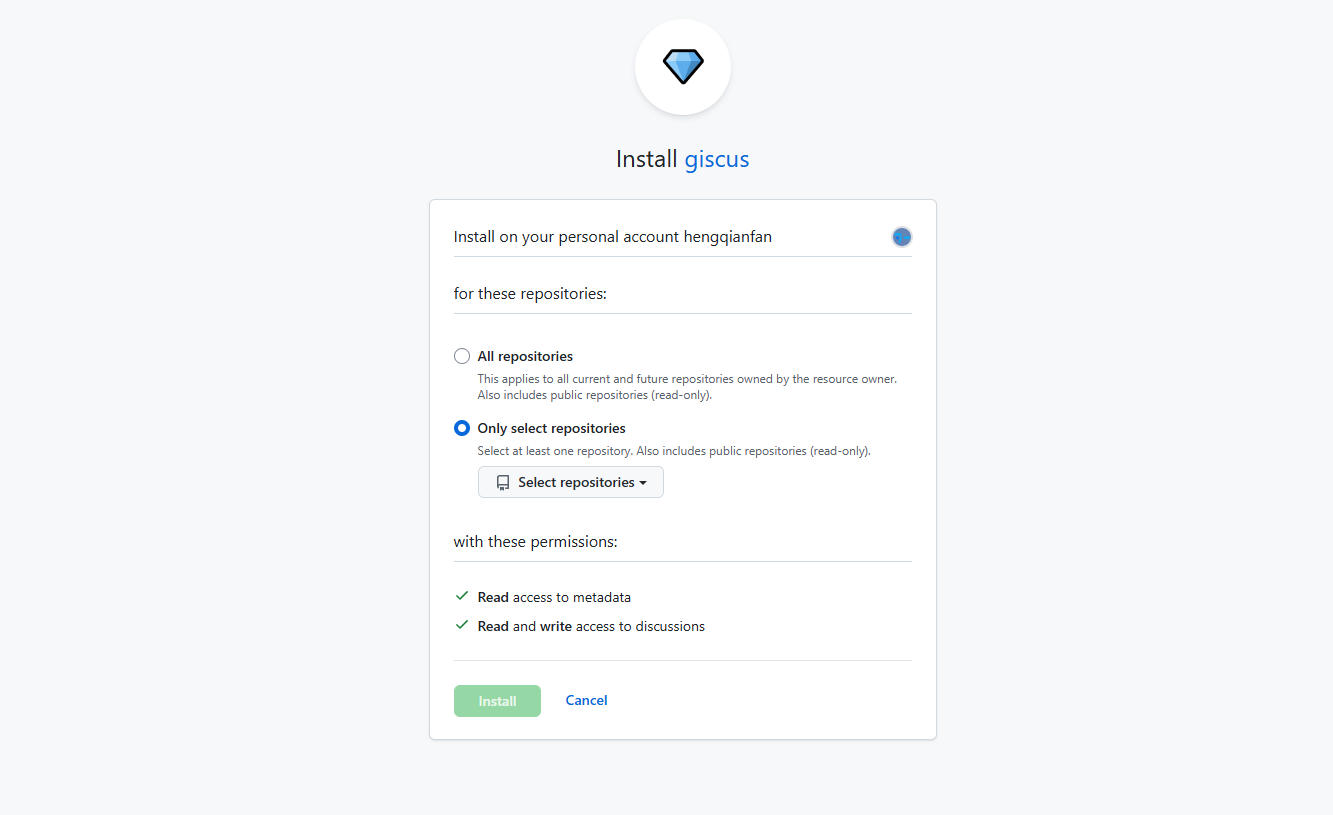
- 后续,也可以通过 Github 网站中的设置随时修改 Giscus 的配置范围
1.4 安装依赖
在 vitepress 项目中安装依赖包
shell
pnpm i @giscus/vue1.5 创建评论区组件
1.5.1 获取配置参数
进入官网后填写配置
请注意:
① 仓库需要公开的
② giscus app 已安装
③ Discussions 功能已在仓库中启用。
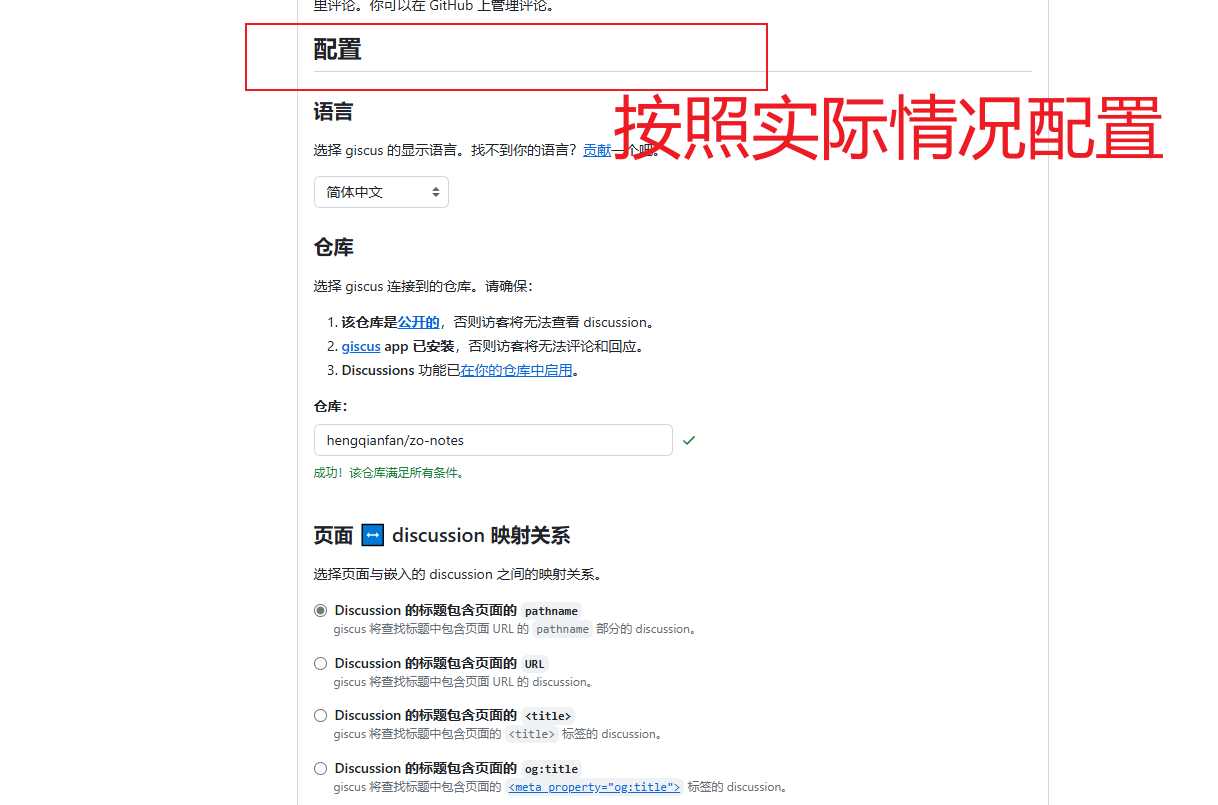
配置完成后,会得到相关参数数据
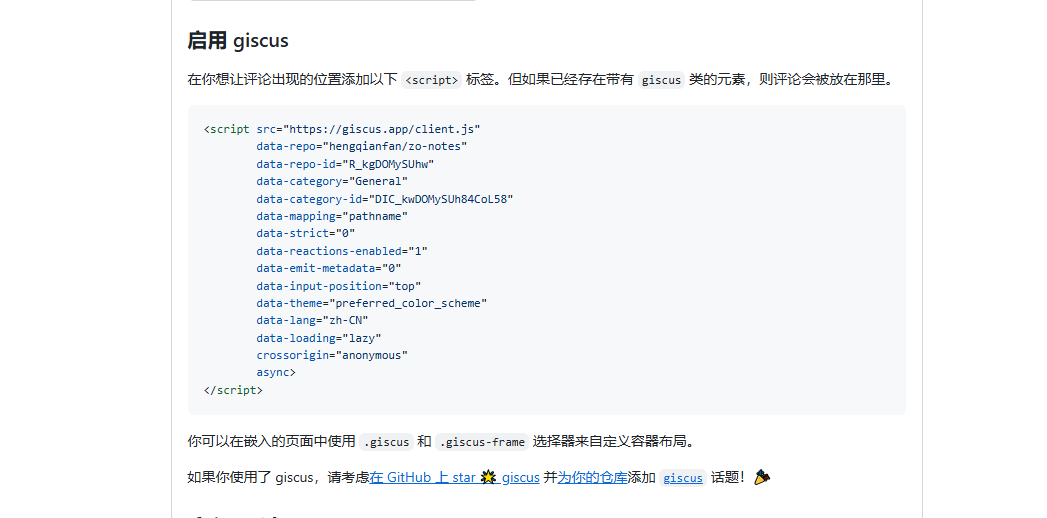
1.5.2 创建组件
💥常见错误
极有可能出现页面空白的情形
如果报错,把括号去掉
import { Giscus } from '@giscus/vue'
换为👇
import Giscus from '@giscus/vue'
在 .vitepress/theme/components 目录下新建 Comment.vue:
vue
<script setup>
import { Giscus } from '@giscus/vue';
// 如果报错,把括号去掉
// import Giscus  from '@giscus/vue';
</script>

<template>
  <div class="comment-container">
    <ClientOnly>
        <!-- 根据实际生成的数据填写/ -->
        <!-- 组件中没有 data 的前缀,但是对应之前生成的参数 -->
      <Giscus
        repo="your-github/repo"
        repoId="your_repo_id"
        category="General"
        categoryId="your_category_id"
        mapping="pathname"
        input-position="top"
        reactionsEnabled="1"
        emitMetadata="0"
        theme="preferred_color_scheme"
      />
    </ClientOnly>
  </div>
</template>
1.5 注册组件
在 .vitepress/theme/index.js 中注册组件:
js
import Comment from './components/Comment.vue'

export default {
  enhanceApp({ app }) {
    app.component('Comment', Comment)
  }
}
1.6 使用组件
在 .vitepress/theme/index.js 中使用组件:
js
// 1. 导入组件
import Comment from './components/Comment.vue'
export default {
  extends: DefaultTheme,
  Layout: () => {
    return h(DefaultTheme.Layout, null, {
      // 2. 在评论区嵌入vitepress的布局插槽中
      'doc-after': () => h(Comment),

    })
  },
2. 集成 waline
2.1 使用 vercel 部署
2.1.1 创建评论服务器
点击此处快速创建